Tuesday, April 19, 2016

夺命肉松芝士软面包(一次发酵法) Pork Floss Cheese Killer Soft Bread (Just Once Fermentation)


做了这夺命面包,现在是越来越喜欢一次发酵法的食谱。


夺命肉松芝士软面包
材料
高筋面粉  260克
即溶酵母  3克
蛋液  50克
鲜奶  100-130克
细糖  30克
  2克
奶油  30克

内馅 : 肉松
表层 : 美乃滋,芝士条
 

做法 :

1. 所有材料混合(外),搅拌至光滑状
2. 加入奶油继续搅拌,搅拌至扩展阶段
3. 面团揉好后,分割成60g一份的小面团,滚圆擀成圆面片
4. 包入肉松,收口捏紧。放入纸托,进行最后发酵至双倍大。
5. 挤上美乃滋,撒上芝士条。
6. 放入预热烤箱里以170度烘烤20-25分钟,面包表面上色后,盖上一张铝箔纸。 


Pork Floss Cheese Killer Soft Bread 
Ingredients :
260g bread flour
3g instant dry yeast
1 egg (50g)
100g-130g milk
30g sugar
2g salt 
30g butter

Filling : pork floss
Toppingmayonnaise,mozzarella cheese   


Method :

1. Mix all the ingredient (except butter) until smooth dough.
2. Add butter continue to knead until smooth and elastic dough.
3. Divide 60g each dough into equal small portion. 
4. Flatten dough and wrap in the pork floss and place it into baking cups.
5. Squeeze mayonnaise and sprinkle with mozzarella cheese onto top of bread
6Bake in preheated oven at 170 C for 20-25 minutes. (Cover bread surface with foil if it browns too quickly) 

(Recipe adapted from Victoria Bakes爱厨房的幸福之味


Monday, April 18, 2016

芒果蛋糕卷 Mango Swiss Roll


芒果蛋糕卷

材料 : 27cmX23cm

蛋黄  3个 
牛奶  60克
玉米油  50克
低筋面粉  50克

粟粉  10克
巧克力粉  5


蛋白  3个

细砂糖  40克


夹心馅
鲜奶油  50克 ( 打发 )
新鲜芒果 ( 切丁) 


做法:

1. 蛋黄+牛奶+玉米油混合均匀。
2. 筛入粉类,拌成均匀的蛋黄糊

3. 蛋白打发至呈粗泡沫状,分次加入细砂糖,打发至干性发泡。
4. 把蛋白霜分次加入蛋黄面糊里,搅拌均匀。

5. 取3大匙蛋糕糊,加入巧克力粉拌匀,入挤花袋里,然后挤出巧克力斜纹。
6. 放入预热烤箱以170度,烘烤1分钟,取出。
7. 将剩余的蛋糕糊倒入烤好的斜纹图案上, 刮平, 轻轻敲出大气泡

8. 放入预热烤箱以170度,烘烤20分钟。
9. 蛋糕出炉后,撕开4边蛋糕纸散热。
10. 抹上奶油,放上芒果丁,卷起。冷藏1小时,待蛋糕定型后,切片即可。


Mango Swiss Roll

Ingredients : 27cmX23cm
3 egg yolks

60g milk
50g corn oil
50g cake flour 
10g corn flour 
5g cocoa powder


3 egg whites

40g caster sugar


Filling
50g fresh cream (whipped)
fresh mango (diced)


Method :
 
1. In a bowl mix together egg yolks,milk and corn oil. 
2. Sieve in flour,whisk until smooth and well combined.
3. Beat egg white and sugar until soft peak form.
4. Take 1/3 of egg white mix into egg yolk batter. Fold in the balance egg white with a spatula till well combine.
5. Take 3 tbsp batter,add in cocoa powder,combine well,transfer to pipping bag,the pipe out the pattern.
6. Bake in preheated oven at 170C for 1 mins.
7. Pour the remaining batter into baking pan and lightly tap the pan to remove big bubbles. 
8. Bake in preheated oven at 170C for 20 mins.
9. Remove pan from oven and gently remove the baking paper,leave to cool completely.
10. Spread evenly a layer of filling,roll it up gently and tightly,wrap and chill in fridge until set.


Wednesday, April 13, 2016

百香果戚风蛋糕 Passionfruit Chiffon Cake


好喜欢百香果独特又浓郁的香味,更爱那酸甜的果肉。
在超市买了一袋的百香果,大部份都是切开了直接吃,
剩下的就做了这百香果戚风。 


百香果戚风蛋糕

材料 20cm中空戚风圆模 


蛋黄  4
细砂糖  30
  1/4茶匙
玉米油  50 
牛奶  20
百香果肉  55
低筋面粉  100
发粉  1/2茶匙


蛋白  4

细砂糖  80
柠檬汁  1/2茶匙


做法


1. 蛋黄加糖和盐用打蛋器搅拌至糖溶。
2. 加入油、牛奶、百香果肉拌均匀。
3. 筛入低粉和发粉,拌均至无粉粒状。
4. 蛋白加柠檬汁打起泡状,分次加入细砂糖,打发成尾端挺立的蛋白霜。
5. 1/3的蛋白霜加入蛋黄糊中,用橡皮刮刀拌匀。
6. 然后倒入其余的蛋白霜,混合拌成均匀的面糊。
7.  将面糊倒入戚风模,敲出气泡。
8. 放入预热烤箱170C40-45分钟或至熟。
9. 出炉倒扣,待凉。


Passionfruit Chiffon Cake


Ingredients :


4 egg yolk

30g castor sugar 
1/4tsp salt
50g corn oil 
20g milk
55g passionfruit pulp 
100g cake flour
1/2tsp baking powder


4 egg white
80g castor sugar
1/2tsp lemon juice 


Method :

1. Whisk egg yolksalt and sugar until sugar dissolved. 
2. Mix in corn oilmilk and passionfruit pulp .
3. Sift in cake flour and baking powdermix wellset aside. 
4. Beat egg white with lemon juice until frothy and add in the sugar in 3 batches. Beating till shiny peaks.
5. Gently fold in egg whites into egg yolk batter until blended. 
6. Pour batter into 20cm chiffon mouldtap pan on table a few times to remove air bubble. 
7. Bake in preheated oven at 170C for about 40-45 mins or until cooked.
8. Remove from oveninvert cake onto table until completely cooled. 

(Recipe reference Fruity Cakes by Alex Goh)


Sunday, April 10, 2016

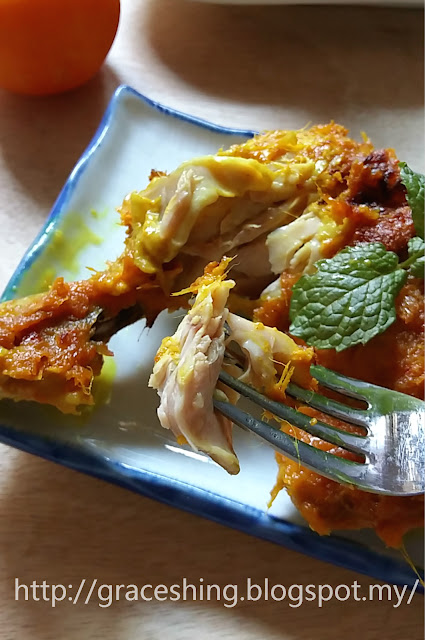
优格烤鸡 Baked Yogurt Chicken


最近爱上烤鸡,只因步骤简单,只需前一天把调味料混合好,
加入鸡肉,放入冰箱腌制。
隔天再取出放入烤箱烤熟,既方便又省时。


这道美味的优格烤鸡食谱取自May家的烤鸡料理,谢谢她的好分享。

优格烤鸡

材料 :
4只 全鸡腿

腌料 : (混均)

酸奶/优格  150克
柠檬汁  2大匙
鲜奶  1大匙
  1大匙 黄糖  2大匙
盐  2茶匙
红辣椒粉  1大匙
黑胡椒粒  1大匙(压碎)
姜末  15克
黄姜粉  1/2茶匙
香茅  2支(切碎)
意大利混合香料  1茶匙
小茴香  1/2 茶匙

做法 :


1. 将鸡腿肉洗净,沥干水份,备用。
2. 将所有腌料混合,搅拌均匀。然后,加入鸡腿肉腌制6个小时或隔夜。
3. 烤盘铺上锡纸,将鸡腿肉摆放在烤盘架上,送入预热烤箱以180度烘烤50分钟或熟 (半途烘烤时, 取出翻面,涂熟腌料)


Baked Yogurt Chicken

Ingredients:
4 chicken whole legs

Marinade:(mixed)


150g yogurt

2 tbsp lemon juice
1 tbsp fresh milk
1 tbsp oil
2 tbsp brown sugar

2 tsp salt
1 tbsp red chili powder
1 tbsp black pepper (crush it)
15g chopped ginger

1/2 tsp turmeric powder
2 lemongrass (chopped)
1 tsp italian mixed herbs

1/2 tsp cumin seeds 


Method:
 
1.  Wash chicken and pat dry.  
2.  Rub chicken with marinade for at least 6 hours or overnight.
3.  Line baking tray with aluminium foil and place chicken onto a baking rack.  Bake in preheated oven for 180C for 50 minutes until chicken is golden brown and well roasted. (Brush chicken with some dripping while roasting.)


(Recipe adapted from 厨苑食谱


Friday, April 8, 2016

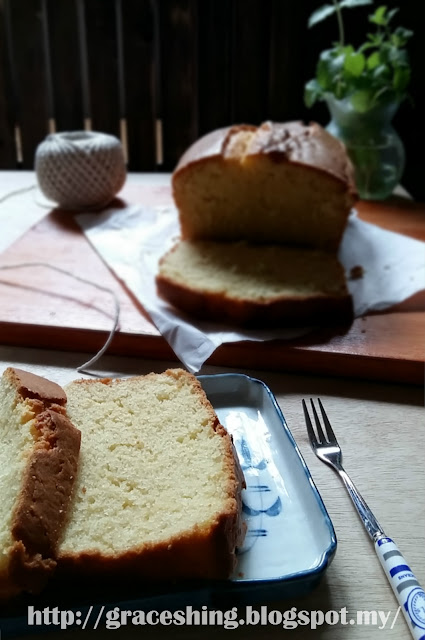
低脂橙味优格蛋糕 Low Fat Orange Yogurt Cake


为了消耗冰箱里两大罐优格,找到这款低脂蛋糕,
食谱的优格量多奶油少,正合我意呀。


低脂橙味优格蛋糕

材料 :

低筋面粉  250克
发粉  1茶匙
苏打粉  1/2茶匙
盐  1/2茶匙
奶油  70克, 软化
橙皮削  2粒
细糖  150克

蛋  2粒,打散
原味优格  1杯 (245克)
香草精  1茶匙
橙汁  2汤匙


做法 :

1. 把面粉,发粉, 苏打粉和盐过筛后, 混合, 备用。
2. 再把优格, 橙汁和香草精混合一起, 备用。
3. 用电动搅拌器, 把牛油和橙皮削搅拌1分钟,加入细糖,以高速搅拌大约3分钟。
4. 慢慢加入蛋液, 搅拌大概2分钟。
5. 用低速搅拌, 加入1/3的粉类, 再转去中速, 加入1/2的优格糊。
6. 用低速, 加入剩下一半的粉类, 再以高速, 加入全部剩下的优格糊。
7. 转回去低速, 拌入剩余的粉类。
8. 搅拌均匀, 倒入烤模里
9. 用180'C烘烤大约45分钟至蛋糕熟透即可。 


Low Fat Orange Yogurt Cake 

Ingredients:

250g cake flour
1 tsp baking powder
1/2 tsp baking soda
1/2 tsp salt
70g butter,soften at room temperature
zest of  2 orange
150g sugar

2 eggs,lightly beaten
1 cup plain,non-fat yogurt (245g)
1 tsp vanilla essence
2 tbsp orange juice


Method:

1. Sift together cake flour,baking powder,baking soda and salt. Set aside.
2. In a bowl,mix together yogurt,vanilla essence and orange juice.
3. With an electric mixer,beat butter and orange zest for 1 min. Add in sugar and beat on high speed for about 3 mins.
4. Add in eggs gradually,about 1 tablespoon at a time,beat constantly for about 2 mins.
5. On low speed,beat in 1/3 of the flour mixture. On medium-high speed,beat in 1/2 of the yogurt mixture. 

6. On low speed,beat in half of the remaining flour mixture. On high speed,beat in the remaining yogurt mixture. 
7. On low speed,beat in the rest of the flour mixture.
8. Scrape into prepared pan and bake in a preheated oven of 180'C for 45 mins or until a toothpick inserted into the centre comes out clean. 


Recipe adapted from Happy Home Baking & Min's Blog)


Wednesday, April 6, 2016

班兰喜粄 Pandan Ki Ka Ku


一直都很喜欢班兰口味的糕点,这次也舍弃南瓜做了班兰喜粄
感觉上更有古早味。


班兰喜粄

材料:

面粉  150g (过筛)
糯米粉  130g (过筛)
即溶酵母  1/2tsp+1/4tsp
细砂糖  60g

粟米油  15g
班兰汁  200g ~ 班兰叶10-15片加清水200克,用搅拌机搅烂,滤渣取汁

香蕉叶  适量


做法:

1. 所有材料混合均匀,搓揉成团。
2. 把面团直接分成每份50克(不需待发),手掌抹上少许油,滚圆。

3. 放在蕉叶上,用手掌心轻压按扁,待发25-30分钟。
4. 发酵好的喜粄,用手指按一按,表面有弹性,就可以开始煮开蒸锅里的水,水滚后放入喜粄,中火蒸12分钟后,马上熄火。(注:不要马上取出锅内的喜粄)
5. 锅盖打开小缝,约5分钟后才打开锅盖取出喜粄。


Pandan Ki Ka Ku
 
Ingredients : 
 
150g plain flour, sifted
130g glutinous rice flour, sifted
1/2tsp + 1/4tsp instant yeast
60g castor sugar
15g corn oil
200g pandan water (Blend 10-15pcs of pandan leaves + 200g of water)
 
Banana leaves (cut into round shapes)
 
 
Method :

1. Mix all ingredients in a mixing bowl, knead until soft and smooth.
2. Divide dough into small portion (about 50g), grease your hand with some oil,shape into small round ball.
3. Place the dough on the banana leaf and flatten the dough by pressing with your palm. .
4. Rest and proof for 25-30 mins.
5. Steam over hot boiling water for 12 mins,open the steamer lid a bit after 5 mins remove from steamer and serve.
 
Recipe adapted from Bernice’s Kitchen)